
Appleton Farms Spiral Ham Cooking Instructions: A Comprehensive Guide
Welcome! This guide provides detailed instructions for perfectly cooking your Appleton Farms spiral ham. We’ll cover everything from initial preparation,
oven temperatures, cooking times, glazing, and safe handling practices for a delicious result.
Enjoy a flavorful and tender ham, ideal for holidays or any special occasion, with our comprehensive cooking advice. Let’s begin your culinary journey!
Understanding Your Appleton Farms Spiral Ham

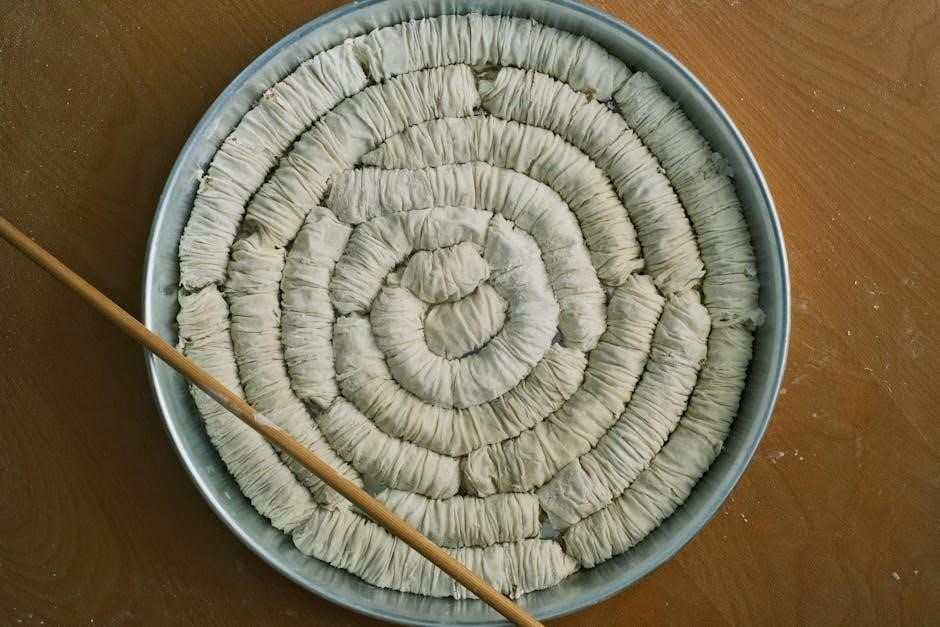
Appleton Farms spiral hams are fully cooked, meaning they require reheating rather than traditional cooking. This convenience simplifies meal preparation, especially during busy holiday seasons; However, understanding the ham’s characteristics is crucial for optimal results. These hams are typically cured, smoked, and pre-sliced in a spiral pattern, allowing for easy serving and enhanced glaze penetration.
The spiral cut significantly reduces carving time, making it a popular choice for gatherings. Because the ham is already cooked, the primary goal is to warm it through while maintaining moisture and flavor. Overcooking can lead to dryness, so careful attention to temperature and time is essential. Different sizes and weights of Appleton Farms spiral hams will necessitate adjusted cooking times, which we will detail later in this guide.
Familiarize yourself with the packaging information, noting the weight and any specific recommendations from Appleton Farms. Knowing these details upfront will contribute to a successful and enjoyable ham-cooking experience. Remember, the ham is meant to be a centerpiece, so proper preparation is key!
Checking Ham Weight and Initial Preparation
Accurate weight assessment is the first step. Remove the ham from its packaging and place it on a kitchen scale to determine the precise weight. This is critical for calculating the correct cooking time, as recommendations are typically based on “minutes per pound.” Note the weight down for easy reference throughout the cooking process.
Next, remove the plastic shield covering the ham. Some hams may include a small packet of glaze; set this aside for later use, or prepare your own glaze (recipes will be provided). Inspect the ham for any damage to the packaging or the ham itself. Ensure it’s free from any unusual odors or discoloration.
Place the ham cut-side down in a roasting pan. Adding approximately ½ to 1 cup of liquid – water, apple juice, or even ginger ale – to the bottom of the pan helps maintain moisture during reheating. This prevents the ham from drying out and adds subtle flavor. Ensure the pan is large enough to accommodate the ham without it touching the sides or the oven rack.
Preheating Your Oven for Optimal Cooking
Proper oven preheating is fundamental to achieving a consistently cooked and flavorful spiral ham. Begin by setting your oven to the recommended temperature range – typically between 325°F and 350°F (163°C ー 177°C). Allow sufficient time for the oven to reach the set temperature; this usually takes around 15-20 minutes, depending on your oven model.
Using an oven thermometer is highly recommended to verify the internal temperature, as oven dials can sometimes be inaccurate. A consistent temperature ensures even heating throughout the ham, preventing some areas from becoming overcooked while others remain underdone.
Ensure there is adequate space within the oven for air to circulate around the ham. Avoid overcrowding the oven with other dishes, as this can impede heat distribution. If necessary, adjust the oven rack to a position that allows for optimal airflow and prevents the ham from touching the heating elements or the oven walls. A centered rack position is generally ideal.
Recommended Oven Temperature Ranges
Appleton Farms spiral hams benefit from a moderate oven temperature to ensure thorough heating without drying out the meat. The generally recommended range for baking is between 325°F (163°C) and 350°F (177°C). Lower temperatures, around 325°F, promote more even cooking and retain moisture, but will extend the overall cooking time.
Conversely, a temperature of 350°F will cook the ham faster, but requires closer monitoring to prevent the glaze from burning or the ham from becoming overly dry. Some sources suggest even lower temperatures, like 300°F (149°C), particularly if you plan on a longer cooking duration or a more elaborate glazing process.
Ultimately, the ideal temperature depends on the ham’s weight and your personal preference. For a consistently moist and flavorful result, starting at 325°F is a safe bet. Always use a reliable oven thermometer to confirm the actual oven temperature and adjust accordingly.
Cooking Time Calculation: Minutes Per Pound
Determining the correct cooking time for your Appleton Farms spiral ham is crucial for a perfectly heated and flavorful result. A common guideline is to calculate cooking time based on minutes per pound of ham weight. Generally, you should plan for approximately 10 to 15 minutes per pound when baking at the recommended temperature range of 325°F to 350°F.
For example, a 3-pound spiral ham would require approximately 30 to 45 minutes of cooking time. However, some sources suggest a more precise calculation of 15 minutes per pound, especially when baking at 300°F. It’s important to remember that these are estimates, and the actual cooking time may vary depending on your oven and the ham’s initial temperature.
Always prioritize using a meat thermometer to verify the internal temperature, rather than relying solely on time calculations. This ensures the ham reaches a safe and delicious final temperature.
Using a Roasting Pan and Liquid
Selecting the right roasting pan and utilizing liquid are essential steps in preparing your Appleton Farms spiral ham for baking. A sturdy roasting pan, large enough to comfortably accommodate the ham without it touching the sides, is necessary. Lining the pan with foil can simplify cleanup afterward.
Adding a small amount of liquid to the bottom of the roasting pan helps maintain moisture during cooking, preventing the ham from drying out. Approximately ½ to 1 cup of liquid is sufficient. Suitable options include water, apple juice, pineapple juice, or even ginger ale, which can subtly enhance the ham’s flavor.
Place the ham cut-side down within the roasting pan, ensuring it’s nestled securely. The liquid should not completely submerge the ham, but rather create a moist environment around it. This technique contributes to a juicier, more tender final product.
Covering the Ham During Baking
Covering your Appleton Farms spiral ham during the initial portion of baking is a crucial step for retaining moisture and preventing excessive browning. This is particularly important given the ham is pre-cooked; the goal is to gently heat it through while keeping it succulent.
You have several options for covering the ham. A disposable aluminum foil tent, loosely fitted over the ham, works effectively. Alternatively, you can use a roasting lid if your pan has one. Ensure the foil or lid isn’t sealed tightly, allowing some steam to escape.
Generally, covering the ham for the first two-thirds of the cooking time is recommended. This allows the ham to heat evenly and stay moist. During the final third, remove the covering to allow the glaze (if using) to caramelize and the surface to develop a beautiful color.
Remember to check the ham periodically to ensure it isn’t drying out, adjusting the covering as needed.
Internal Temperature: The Key to Doneness
Achieving the correct internal temperature is paramount when cooking an Appleton Farms spiral ham, as it ensures both safety and optimal flavor. Since these hams are pre-cooked, you aren’t aiming for a specific “cooked” temperature, but rather a thorough reheating to a safe and enjoyable serving point.
The USDA recommends reheating pre-cooked ham to an internal temperature of 140°F (60°C). This temperature guarantees any potential bacteria are eliminated while maintaining the ham’s moisture and tenderness. Relying solely on cooking time can be unreliable, as oven variations and ham size impact heating rates.
A reliable meat thermometer is your best friend in this process. Insert the thermometer into the thickest part of the ham, avoiding the bone, to obtain an accurate reading. Check the temperature in multiple locations to ensure even heating.
Once the internal temperature reaches 140°F, the ham is ready to rest before carving. Don’t underestimate the importance of this step – it allows the juices to redistribute, resulting in a more flavorful and moist ham.
Using a Meat Thermometer Correctly
Accurate temperature reading is crucial for a perfectly reheated Appleton Farms spiral ham. To use a meat thermometer effectively, begin by ensuring it’s calibrated for precision; Digital thermometers are generally more accurate than analog versions.
Insert the thermometer into the thickest part of the ham, avoiding contact with the bone or any large pockets of fat. These areas can provide inaccurate readings. Aim for the center of the ham, ensuring the probe penetrates deep enough to measure the internal temperature reliably.
Multiple readings are recommended. Check the temperature in two or three different spots to confirm even heating throughout the ham. This is especially important for larger hams.
Avoid opening the oven door frequently during cooking, as this releases heat and prolongs the cooking time. Check the temperature towards the end of the estimated cooking time. Remember, you’re aiming for 140°F (60°C) for a safe and delicious result;
Glazing Options for Appleton Farms Ham
Enhance your Appleton Farms spiral ham with a delectable glaze! Glazing adds a beautiful sheen and complementary flavors, elevating the overall dining experience. Numerous options exist, ranging from classic to innovative.
Traditional choices include brown sugar and honey glazes, often combined with mustard or pineapple juice for a tangy sweetness. Maple syrup glazes offer a rich, autumnal flavor profile. For a spicier kick, consider a glaze incorporating Dijon mustard, cayenne pepper, or even a touch of bourbon.
Fruit-based glazes, like apricot or cherry preserves, provide a vibrant sweetness and beautiful color. Experiment with adding citrus zest or juice for brightness. Remember to apply the glaze during the last 30-45 minutes of cooking, brushing it on several times to build up a luscious coating.
Don’t be afraid to get creative! Consider a glaze with balsamic vinegar, ginger, or even a savory herb blend. The possibilities are endless, allowing you to customize the flavor to your preference.
Popular Glaze Recipes
Here are a few popular glaze recipes to complement your Appleton Farms spiral ham, offering diverse flavor profiles. First, the Classic Brown Sugar Glaze: combine 1 cup packed brown sugar, ½ cup honey, ¼ cup Dijon mustard, and 2 tablespoons apple cider vinegar.
Next, try the Pineapple Honey Glaze: blend 1 cup pineapple juice, ½ cup honey, ¼ cup brown sugar, and 1 tablespoon Dijon mustard. For a spicier option, the Bourbon Mustard Glaze mixes ½ cup bourbon, ¼ cup brown sugar, 2 tablespoons Dijon mustard, and 1 teaspoon cayenne pepper.
A simpler Maple Glaze requires only ¾ cup maple syrup and 2 tablespoons of butter, melted. For a fruity twist, the Apricot Cherry Glaze combines ½ cup apricot preserves and ½ cup cherry preserves.
Remember to brush these glazes onto the ham during the final 30-45 minutes of cooking, reapplying every 10-15 minutes for a beautiful, flavorful coating. Adjust sweetness and spice levels to your liking!
Resting the Ham After Cooking
Resting your Appleton Farms spiral ham after cooking is absolutely crucial for achieving optimal tenderness and juiciness. Once removed from the oven, do not immediately carve; Instead, tent the ham loosely with aluminum foil. This allows the juices to redistribute throughout the meat, preventing it from drying out during carving.
A resting period of at least 20-30 minutes is recommended, though longer is perfectly acceptable, even up to an hour. The ham will continue to cook slightly during this time, known as carryover cooking, raising the internal temperature a few degrees.
Resist the temptation to pierce the ham during resting, as this will release valuable juices. The foil tent helps maintain warmth while allowing the ham to relax. Proper resting ensures a more flavorful and succulent dining experience, maximizing the enjoyment of your Appleton Farms spiral ham.
Consider this step as vital as the cooking itself – it truly makes a difference!
Carving a Spiral Ham: A Step-by-Step Approach
Carving a spiral ham is surprisingly easy thanks to the pre-sliced nature! Begin by placing the ham on a large carving board with the cut side facing down. Using a small, sharp knife, carefully run it between the meat and the fat along the bone, releasing individual slices.
Work your way around the ham, following the natural spiral cut. Gently lift each slice as you go, avoiding tearing. You can either serve the slices directly from the bone or transfer them to a platter.

For a more elegant presentation, remove the entire spiral section at once. Start at one end and carefully slide the knife along the bone, separating the spiral. Then, arrange the slices artfully on a serving dish.
Don’t forget to collect any smaller pieces or end slices – they’re perfect for sandwiches or ham salad! Enjoy the fruits of your labor and savor the deliciousness of your perfectly carved Appleton Farms spiral ham.
Reheating Leftover Spiral Ham
Reheating leftover spiral ham is a breeze, ensuring you can enjoy its deliciousness for days! The key is to prevent it from drying out. For smaller portions, wrap them individually in plastic wrap, then foil, before reheating;
Oven Method: Preheat your oven to 325°F (160°C). Place the ham in a baking dish with a tablespoon or two of water or broth to create steam. Cover with foil and bake for approximately 10-15 minutes per pound, or until heated through.
Microwave Method: For quicker reheating, use the microwave. Place the ham on a microwave-safe dish with a little liquid. Cover and microwave on medium power in 2-3 minute intervals, checking for doneness between each interval.
Ensure the internal temperature reaches 140°F (60°C) before serving. Properly reheated ham remains tender and flavorful, making it a versatile ingredient for sandwiches, omelets, or simply enjoyed on its own!
Safe Handling and Storage of Ham
Food safety is paramount when handling and storing Appleton Farms spiral ham. Always wash your hands thoroughly with soap and water before and after handling raw or cooked ham. Keep the ham refrigerated at 40°F (4°C) or below.
Before cooking, ensure the ham is properly sealed and shows no signs of spoilage, such as unusual odors or discoloration. After cooking, refrigerate leftovers within two hours. Store leftover ham in airtight containers or tightly wrapped in plastic wrap or foil;
Properly stored, cooked spiral ham will remain safe to eat for 3-5 days in the refrigerator. For longer storage, freezing is an option. Wrap the ham tightly in freezer-safe packaging to prevent freezer burn. Frozen ham can last for 1-2 months.
Always reheat ham to an internal temperature of 140°F (60°C) to kill any potential bacteria. Discard any ham that has been left at room temperature for more than two hours.
Troubleshooting Common Cooking Issues
Ham drying out: If your Appleton Farms spiral ham appears dry, ensure sufficient liquid is in the roasting pan. Baste the ham frequently with pan juices or glaze during the last hour of cooking. Covering the ham with foil for part of the cooking time can also help retain moisture.
Uneven cooking: Ensure your oven temperature is accurate. Rotate the roasting pan halfway through cooking for more even heat distribution. Avoid overcrowding the oven with other dishes.
Glaze not sticking: Apply the glaze during the final 30-45 minutes of cooking. Multiple glaze applications, brushed on every 15 minutes, create a richer, stickier finish. Ensure the ham’s surface isn’t excessively wet before glazing.
Ham not heated through: Use a reliable meat thermometer to verify an internal temperature of 140°F (60°C). If the ham isn’t reaching temperature, extend the cooking time, checking every 15-20 minutes. Remember cooking times are estimates and vary by ham size and oven.